Monday, 20 February 2012
How to create a Windows Vista / 7 installation disc (bootable) using ImgBurn by GANESH PRABHU
This guide will take you through the steps in burning a pre-prepared Windows Vista / Windows 7 installation source directory to a disc.
Note: Instructions wise, Windows 2008 should be basically the same as Windows Vista, and Windows 2008 R2 should be basically the same as Windows 7.
My source directory (which I've called 'VISTA_INSTALL') looks as follows:
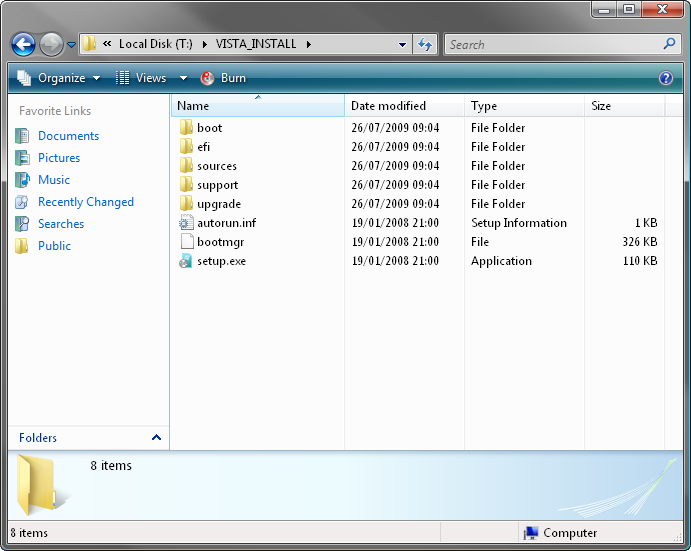
That's everything you'd get on an original Vista installation disc. If you're missing bits (e.g. the 'boot' folder), it probably won't work.
Right, let's begin!
1. Load ImgBurn!
2. Click the 'Write files/folders to disc' button.
Note: This is basically the same as switching the 'Mode' to 'Build' and setting 'Output' to 'Device'.

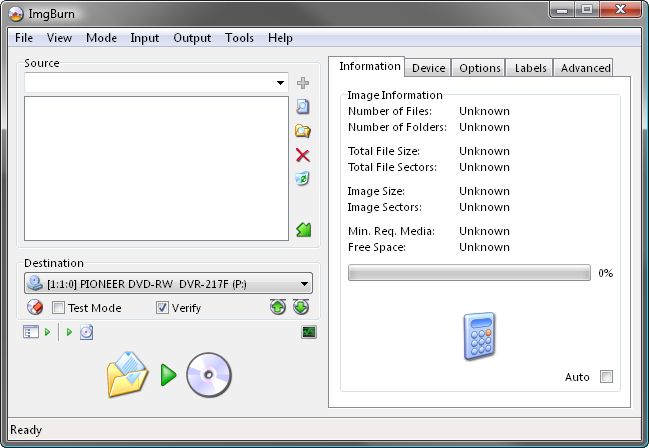
You should now see a screen like this:
3. Insert a blank (or erasable) DVD disc in your burner.
Note: The message in the status bar should now say something along the lines of 'Ready'.
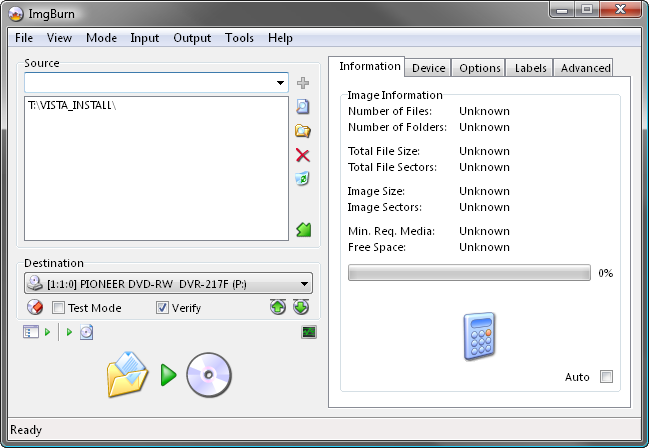
4. Add the installation source folder to the 'Source' box.
5. Switch to the 'Advanced' tab, and then to the 'Bootable Disc' one.
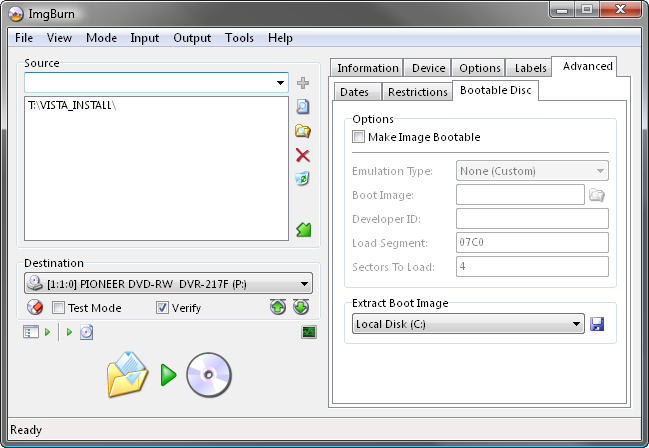
6. Enable the 'Make Image Bootable' option.
Set the 'Emulation Type' to 'None (Custom)'.
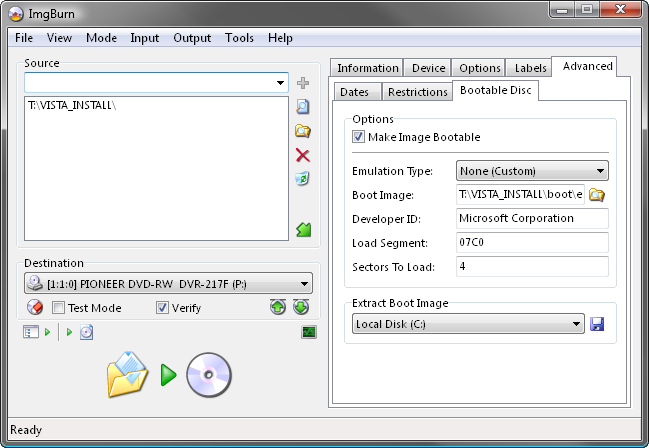
Point the 'Boot Image' to the 'etfsboot.com' file within the 'boot' folder in your source folder - i.e. "T:\VISTA_INSTALL\boot\etfsboot.com"
Enter 'Microsoft Corporation' in the 'Developer ID' field.
Enter '07C0' in the 'Load Segment' field.
Enter '4' in the 'Sectors To Load' field if your etfsboot.com file is 2K in size, enter '8' if it's 4K. (Basically it's the size of the file in bytes divided by 512 - i.e. 2048 / 512 = 4)
Note: Vista's is normally 2KB and Windows 7's is 4KB... so enter '4' if you're building a Vista OS installation disc and '8' if you're building a Windows 7 OS installation disc.
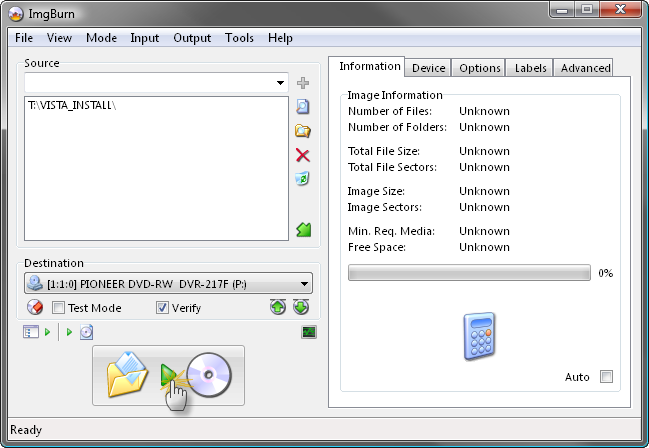
7. Now we're ready to burn so click the big 'Build' button!
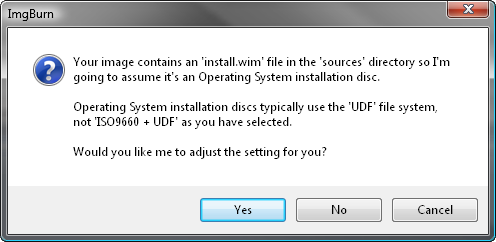
8. Assuming your source folder is in order (i.e. it contains a 'sources' folder with an 'install.wim' file in it) and depending on your current settings, the program will prompt to correct certain things so they match (as closely as possible) an official Microsoft disc/image.
Click 'Yes' to whatever it says needs correcting - these settings have been tried and tested so we know they work!
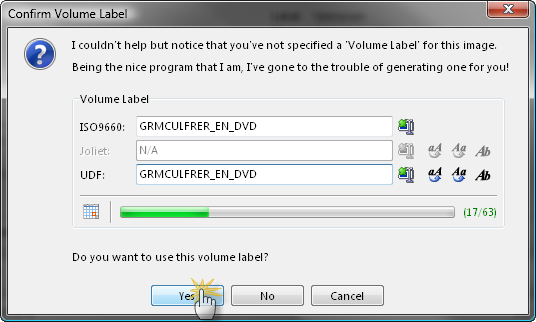
9. When prompted, give the disc a name and click the 'Yes' button.
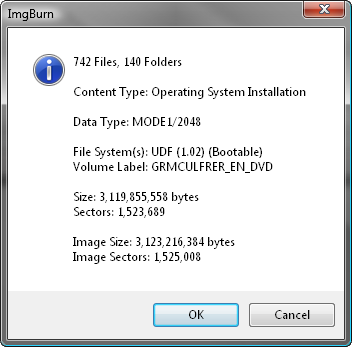
10. You'll then be presented with one final 'information' screen before the program starts to burn the disc.
Double check everything looks roughly as it does below and then click 'OK'.
That's it!
Note: Instructions wise, Windows 2008 should be basically the same as Windows Vista, and Windows 2008 R2 should be basically the same as Windows 7.
My source directory (which I've called 'VISTA_INSTALL') looks as follows:
That's everything you'd get on an original Vista installation disc. If you're missing bits (e.g. the 'boot' folder), it probably won't work.
Right, let's begin!
1. Load ImgBurn!
2. Click the 'Write files/folders to disc' button.
Note: This is basically the same as switching the 'Mode' to 'Build' and setting 'Output' to 'Device'.
You should now see a screen like this:
3. Insert a blank (or erasable) DVD disc in your burner.
Note: The message in the status bar should now say something along the lines of 'Ready'.
4. Add the installation source folder to the 'Source' box.
5. Switch to the 'Advanced' tab, and then to the 'Bootable Disc' one.
6. Enable the 'Make Image Bootable' option.
Set the 'Emulation Type' to 'None (Custom)'.
Point the 'Boot Image' to the 'etfsboot.com' file within the 'boot' folder in your source folder - i.e. "T:\VISTA_INSTALL\boot\etfsboot.com"
Enter 'Microsoft Corporation' in the 'Developer ID' field.
Enter '07C0' in the 'Load Segment' field.
Enter '4' in the 'Sectors To Load' field if your etfsboot.com file is 2K in size, enter '8' if it's 4K. (Basically it's the size of the file in bytes divided by 512 - i.e. 2048 / 512 = 4)
Note: Vista's is normally 2KB and Windows 7's is 4KB... so enter '4' if you're building a Vista OS installation disc and '8' if you're building a Windows 7 OS installation disc.
7. Now we're ready to burn so click the big 'Build' button!
8. Assuming your source folder is in order (i.e. it contains a 'sources' folder with an 'install.wim' file in it) and depending on your current settings, the program will prompt to correct certain things so they match (as closely as possible) an official Microsoft disc/image.
Click 'Yes' to whatever it says needs correcting - these settings have been tried and tested so we know they work!
9. When prompted, give the disc a name and click the 'Yes' button.
10. You'll then be presented with one final 'information' screen before the program starts to burn the disc.
Double check everything looks roughly as it does below and then click 'OK'.
That's it!
Tuesday, 14 February 2012
fTalk – A Facebook Chat Client for Desktop
Looked from the interface appearance, I think that this fTalk application adopted some MSN Messenger views. fTalk has cool features for such a chat application. fTalk will give a notification when there is one of your facebook friends is online, and you can use smiley icons like Yahoo Messenger’s smiley. You can also update your status directly from this application.
- Faster and more accessible than Facebook chat
- No need to open Facebook
- Get notified when friends come online
- Update your status right from the app
- Free and easy to use
- Cool emoticons

fTalk may not have a lot of fancy features, but it serves as a lightweight Facebook chat client with a clean interface. During testing, fTalk had a memory stamp of approximately 36MB. fTalk works on Windows XP, Windows Vista and Windows 7.
Subscribe to:
Comments
(
Atom
)


